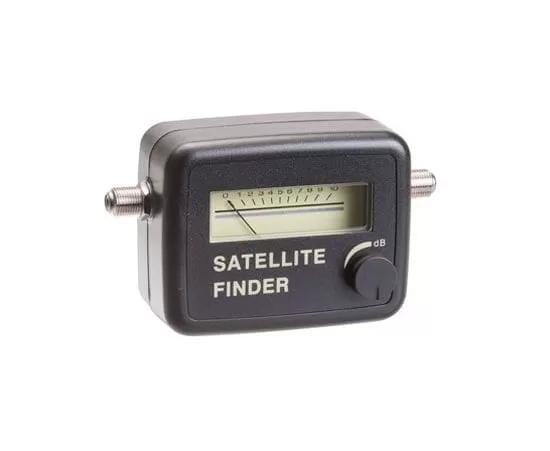
If you want to know how do I check my Analog Satellite Signal Finder? then you are on the right page. Analog satellite signal finders are used to help locate and fine-tune the reception of satellite TV signals. Here are the basic steps for using an analog satellite signal finder. So without wasting your internet data on YouTube, you can just read it how to use an analog satellite signal finder meter. It is a very simple satellite finder manual. It is the best way to use a satellite finder to set the dish.
FAQs –
Table of Contents
How to use –
- Connect the satellite signal finder to the satellite dish using a coaxial cable.
- Turn on the satellite receiver and the Set-Top Box, and set the Set-Top Box to the correct home frequency.
- Adjust the angle and direction of the satellite dish so that it points towards the satellite you want to receive signals from. You can refer to a satellite dish pointing guide or use a satellite dish alignment app for help. Once you have a good signal, tighten the dish mounting hardware to secure it in place.
- Turn on the signal finder adjust the sensitivity and gain settings to an appropriate level.
- Connect a cable from the dish LNB to the “LNBF IN” port of the satellite finder.
- Now connect another wire from the satellite finder to your satellite receiver’s “TO DISH” or “LNBF IN” or “SAT IN” port.
- When the Analog Satellite Signal Finder starts beeping turn its sensitivity down slowly (A Volume Type Button) until the beeping just stops.
- Move your dish up/down/left/right again until the finder starts beeping.
- Repeat the process until the TV screen gets a good signal.
- Put it in its highest sensitivity setting. Move your dish up/down/left/right until the finder starts beeping. Move the satellite dish slowly in a horizontal and vertical direction while monitoring the signal finder’s display. Stop moving the dish when the signal strength on the display reaches its highest level.
- Scan TP Signals the dish position to achieve the best possible signal strength, using small adjustments and checking the signal finder display frequently.
Power Supply –
SAT Finders get power from a satellite receiver but you can power it from a suitable regulated DC supply or 12v battery instead. The instructions guide will be included with the satellite finder.Digital Satellite dB Finder –
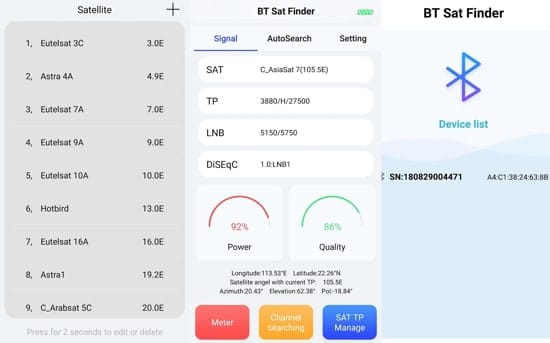
The Digital Satellite dB meter will also work the same as the Analog Signal Finder, There is only a difference in display. You will get a digital display in a digital satellite dB finder.dB Finder Vs dB Meter? –
No, both are not the same, you can find about dB meter here.I hope you will stop finding out how an analog satellite finder works.FAQs –
How does an analog satellite finder work?
An analog satellite finder works by detecting and displaying the strength of the satellite TV signal that is received by the satellite dish. It does this by connecting to the LNB (Low Noise Block) that is attached to the satellite dish and converting the signal to an analog audio and visual display on the device. The user can then use the signal strength indicator to adjust the position of the dish until the optimal signal strength is achieved.How do you use a satellite signal finder?
To use a satellite signal finder, you will need to connect it to the LNB on your satellite dish and follow the instructions provided by the sat finder. Generally, you will need to adjust the sensitivity and gain settings on the signal finder, move the dish horizontally and vertically while monitoring the signal strength on the display, and make small adjustments to the dish until the optimal signal strength is achieved.What is the difference between digital and analog satellite finders?
The main difference between digital and analog satellite finders is the way they display signal strength. Analog satellite finders use analog audio and visual displays to show the strength of the signal, while digital satellite finders use a digital display that provides more precise and accurate readings. Digital satellite finders also tend to have more advanced features, such as the ability to display the satellite’s name and orbital position.Which is the better analog or digital signal?
When it comes to satellite signal finders, digital signal finders are generally considered to be more accurate and precise than analog signal finders. Digital signal finders also tend to have more advanced features and are often easier to use than analog signal finders.Do satellites use analog satellite signals?
Most modern satellites use digital signals for transmitting TV and radio signals. However, some older satellites may still use analog signals. It’s important to check the specifications of the satellite you are trying to receive signals from to determine whether it uses analog or digital signals.What is the frequency of an analog satellite finder?
The frequency range of an analog satellite finder will depend on the specific model and manufacturer. Generally, analog satellite finders will cover a frequency range of 950-2150 MHz.How do you test an LNB signal by analog satellite finder?
To test an LNB signal with an analog satellite finder, you will need to connect the signal finder to the LNB using a coaxial cable. Once connected, turn on the satellite receiver and the TV, and set the TV to the correct input. Adjust the sensitivity and gain settings on the signal finder, and move the dish horizontally and vertically while monitoring the signal strength on the display. Make small adjustments to the dish until the optimal signal strength is achieved.Which is more accurate analog or digital sat finder?
Digital satellite finders are generally considered to be more accurate and precise than analog satellite finders. Digital satellite finders provide more precise and accurate readings and often have more advanced features than analog satellite finders.Discover more from TrackDish - TV Installation Guide
Subscribe to get the latest posts sent to your email.
Show Comments


